Get in touch with Yun-Sculpture company
How to Organize a Gazebo: Placement & Furniture Layout

Garden design · A place to sit, a clear way in
Choose the activity first. Everyday dining favors a convenient route; a reading retreat may earn a longer walk.
Draw the furniture in use. Include pulled-out chairs, opening lids and the route people will actually take.
Check two views. Look toward the gazebo from the house, then look out from the intended seat.
Wondering how to organize a gazebo so it feels inviting rather than crowded? Start with its place in the garden and the way you enter it. A beautifully centered pavilion can still interrupt a daily route; an attractive table arrangement can become awkward the moment someone pulls out a chair.
Browse Yun Sculpture’s gazebos and garden pavilions for the architectural possibilities. This guide helps you turn a preferred shape into a position, furniture arrangement and approach that work together.
In this guide
Where should a gazebo go in the backyard?
Give it one main job before choosing a location. “A dining place we will use on ordinary evenings” suggests a different position from “a quiet seat at the end of the garden.” If you want both, decide which use happens most often and test the other against it.
The University of Florida’s landscape-design guidance connects activity areas with the people who use them and the paths between them. For a gazebo, that means drawing the trip from the house as carefully as the structure itself.
A · Beside the patio
A short branch from the fixed path; the lawn stays beyond.
B · To one side
A longer side branch, with the seating away from the main route.
C · At the path end
The same gazebo becomes the destination of the route.
| Position | Why choose it? | What do you give up or need to test? |
|---|---|---|
| A · Beside the patio | A short trip for meals, drinks and an impromptu seat outdoors. | The gazebo becomes part of the view from nearby rooms. Walk the door-to-garden route to see whether the new structure or its furniture interrupts it. |
| B · To one side | A gathering place beside the lawn, with a different angle toward planting. | You add a branch from the main path. Check whether that branch meets an actual opening rather than a railing or column. |
| C · At the end of the path | A destination that draws the eye farther into the garden. | The longer trip needs to suit your habits. Try it carrying what you normally take outside, rather than judging the view alone. |
For family dinners, A may win because it is convenient enough to use often. For a separate reading corner, B may offer a better relationship with the view and passing traffic. For a garden designed around a distant focal point, C is worth comparing. These are choices about use, not a ranking of good and bad positions.
Make the comparison on your own site. Mark each candidate with freestanding markers, set out a chair and walk from the usual door. Avoid driving stakes into ground with unverified services. Keep the house, paths and existing features on the sketch; moving everything at once makes it harder to see why a position works.
Compare the view toward the gazebo with the view from it
A gazebo has at least two visual jobs. From the house it may be a landmark, framed by planting or aligned with a window. From inside it should give the seated person something worth looking at. A position can succeed at one and disappoint at the other.
Take a photograph from the window where you will see it most often. Then sit at the proposed location and photograph outward at seated eye level. Mark the feature you want to see: a planted border, a sculpture, a fountain or open lawn. Look for a column, rail or chair back that would fall across that line.
When considering backyard designs with gazebos, draw the viewing direction separately from the entrance. A path does not have to point straight at the main view. Turning the entry can preserve a visual axis while keeping arrival beside the seating group, provided the chosen structure supports that opening arrangement.
Choose privacy from the seat, not just from the property plan
Check the view toward neighboring windows as well as toward the garden. Before adding a screen around every side, compare one screened edge, a different chair direction and a slight change of position. A screen behind the main seat may frame the planting; the same screen across the entrance may make the space feel closed and complicate arrival.
Repeat the seated check at the hours you intend to use the gazebo. Note glare, direct sun and noticeable drafts. This establishes the comfort brief without assuming that a roof outline or a nearby tree will solve every exposure problem.
Gazebo layout design: draw the furniture in use
Start inside the actual obstructions. Ask the drawing to distinguish the outside platform, column bases, inside faces of railings and clear entry opening. An overall diameter or roof dimension is not a furniture plan. For a round structure, measure useful spans where the furniture will sit rather than assuming every direction has the full outside diameter available.
Trace the actual chairs and table, including arms and projecting legs. Add the positions occupied when a chair is pulled out or a recliner is extended. For a storage bench, draw its lid or door open. The important outline is the space these pieces need while being used, not only their neat, tucked-in arrangement.
A complete comparison: the same space, the same table, a different position
The following hypothetical example starts with a 3.60 × 3.60 m working area already drawn inside the fixed obstructions. The table is 0.80 × 1.60 m. The assumed envelope for the table, four chairs and their movement is 2.40 × 2.40 m. The 1.00 m entry stays in the same position at the lower right.
A · Centered group
The spare width is shared: 0.60 m on each side.
B · Group shifted left
The right strip widens to 1.10 m; the left gap reduces to 0.10 m.
A centers the furniture group. A 2.40 m envelope inside 3.60 m leaves 1.20 m across its two sides, or 0.60 m on each side when centered. This creates a balanced composition, but the right-hand passage beside the occupied group is narrower than the entry.
B shifts the same group 0.50 m to the left. The left gap becomes 0.10 m and the right strip becomes 1.10 m: 0.10 + 2.40 + 1.10 = 3.60 m. That strip aligns with the unchanged entry. The trade-off is less space on the left; it is not a second passage. The full chair-use envelope must genuinely include the movement needed on that side.
Neither plan gains floor area or changes the furniture. B concentrates the spare width into one continuous route; A shares it around the group. Choose what to compare next according to the activity: serving a meal, moving to a rear seat, turning with a mobility aid, or simply keeping a quieter visual center.
These dimensions demonstrate the arithmetic only. They are not Yun product sizes, recommended passage widths or an accessibility assessment. Replace the assumed envelope with your actual furniture and user needs; have required circulation and access dimensions checked for your project.
Dining, lounging or an open center?
- Dining: test the route while people remain seated. Can someone carry a tray to the far chair without asking everyone to stand? A small side table may solve serving more effectively than enlarging the dining table.
- Lounging: compare the seat depth and extended positions. A generous sofa can fit against one edge yet leave its ottoman in the arrival route. Turn individual chairs toward the view before adding a second large piece.
- An open center: place selected seating at the perimeter and keep the entrance legible. Check where feet, bags and movable tables land when those seats are occupied.
A continuous built-in bench fixes the direction of sitting and limits later rearrangement. Separate chairs offer more flexibility but need their own movement space. In a round gazebo, compare a short curved seating segment with a complete perimeter arrangement before committing to either. A railing is a boundary, not automatically a seat.
What the factory photographs reveal about usable space
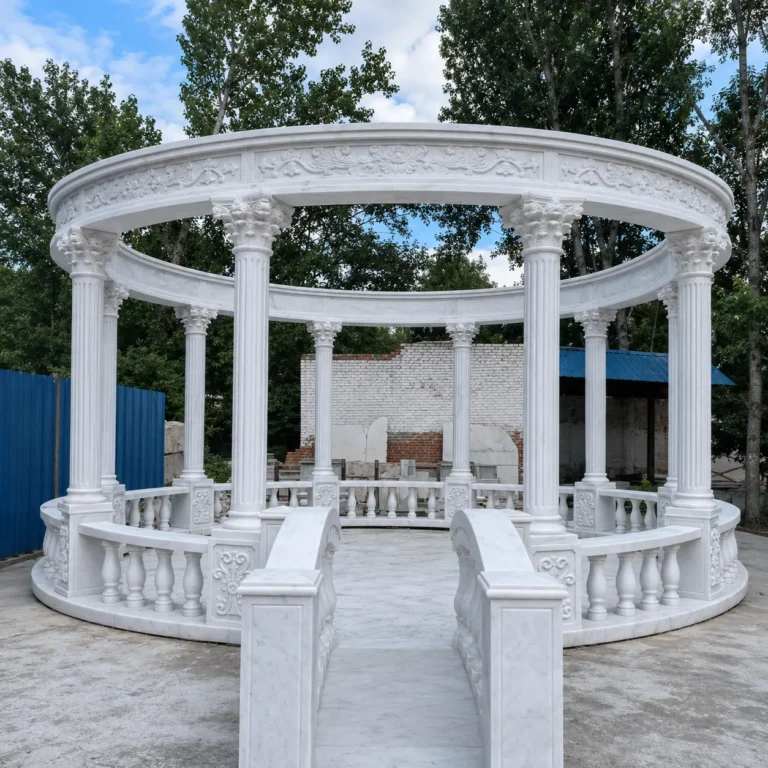
The opening photograph shows a broad approach between low railings. Its floor leads into a circular interior rather than stopping at a decorative front. You can borrow that relationship: align the arrival with the opening, then draw the furniture far enough inside that it does not become the first obstacle.
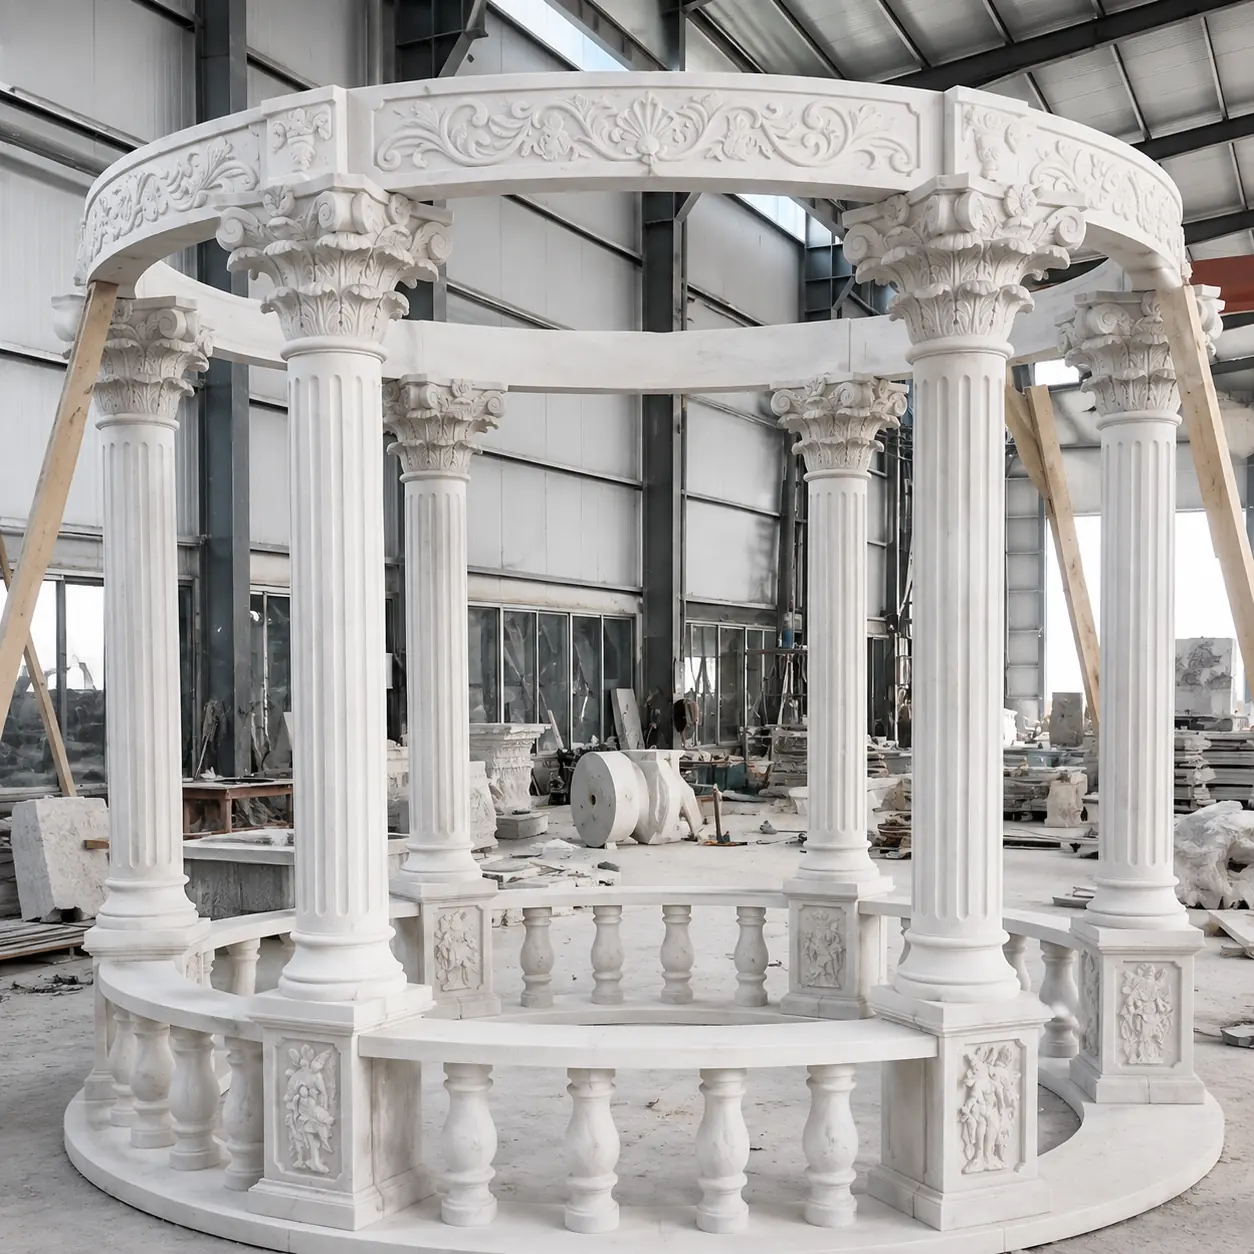
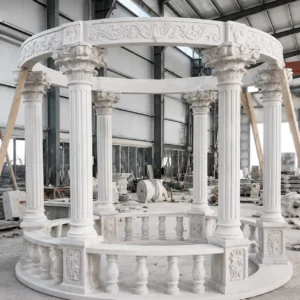
In this separate workshop assembly, the curved rail across the foreground connects substantial square plinths beneath the columns. The lower bases project farther into the floor than the slim shafts above. Those are the edges to record on a furniture drawing. The photograph is useful for seeing how the carved perimeter is composed; the actual clear dimensions come from the selected design’s drawing.
There is also a practical visual choice. Repeated balusters give the seating area a strong boundary, while an open bay lets the lawn or planting read as a continuation of the interior. Decide which edge should frame the view and which must stay open for arrival before repeating the same railing around every bay.
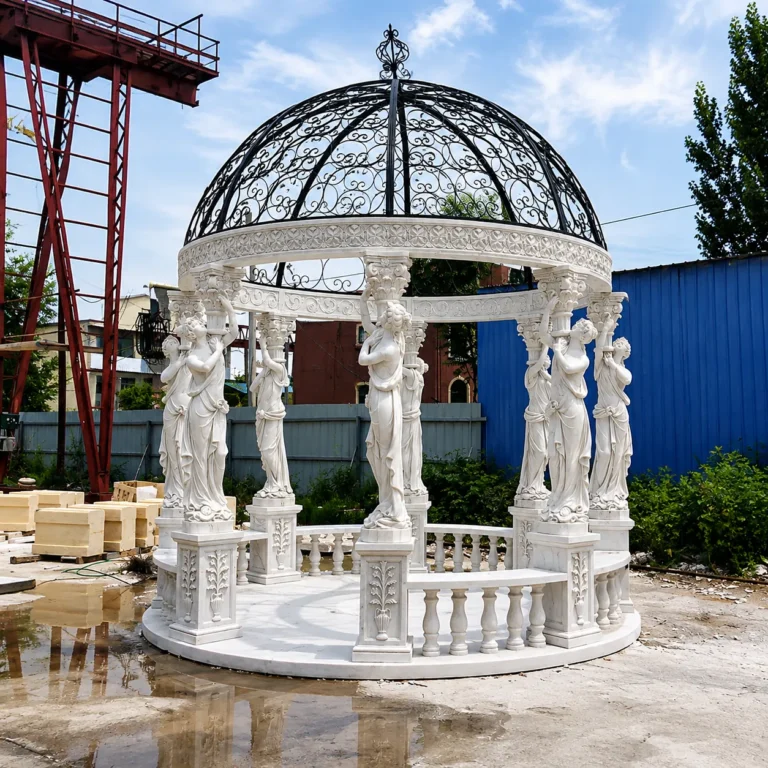
The figure-column pavilion makes that choice more pronounced. The sculpted bodies, raised arms, square pedestals and upper carving create a sequence of framed views. A chair can face between the figures to emphasize the garden, or toward a figure when the carving itself is the subject. Judge that relationship from sitting height as well as from the front photograph.
These stone photographs show different factory assemblies, not a sequence from one installation. They provide visible evidence of column, figure and balustrade carving. Compare the marble and stone gazebo designs for the architectural direction; use a separate measured plan for your furniture.

The metal garden-room frame is a separate workshop reference. Its repeated straight bays are a useful contrast to the curved stone perimeter. For a rectangular scheme, mark the intended door bay, any opening leaves and the space needed to reach the corners. Enclosed garden rooms and open gazebos have different enclosure needs; this photo demonstrates visible fabrication, not an approved layout for the examples above.
For ornamental iron gazebo design directions, discuss the proposed openings along with the frame. Avoid planning furniture against an opening that later needs to serve as the main entrance.
Gazebo designs for decks and existing patios: keep both layouts
Draw the deck or patio as well as the gazebo. Mark the house door, stairs, existing rails and the route to the rest of the garden. Then add the gazebo’s outer extent and its occupied furniture. A pavilion may fit within the deck outline yet leave an awkward approach around a post or a pulled-out chair.
Keep two questions separate: Does the arrangement work for people? and Can the site support and secure this specific structure? A furniture plan answers the first. For the second, give the local project team the proposed component and support locations, the existing deck or patio information and site conditions.
Foundation, anchoring, drainage and required approvals belong to the project review. Our gazebo foundation and installation overview introduces that separate topic; final details must come from the actual site and design. For a comparison of quotation scope, keep site work, unloading and installation separately identified.
How close can the gazebo be to a house or fence?
Do not set its position from a generic online distance. Ask the local permitting or planning authority which requirements apply to the proposed structure and which part is used for measurement. Mark the relevant boundary and proposed roof projection on the site plan. A fence line alone is not enough information to establish the legal boundary or applicable clearance.
Turn the preferred arrangement into one clear sketch
Keep the sketch simple enough to understand without a phone call. Use one sheet to connect the garden position with the interior arrangement, and number the photographs to match its view arrows. You can begin with approximate measurements if they are labeled; distinguish them from dimensions already measured on site.
Label these five things
- Available area: measured boundaries, proposed extent and known obstructions.
- Entry: the intended opening and any existing steps or changes of level.
- Furniture: actual sizes and the space needed while pieces are used.
- View: seated direction and matching, numbered site photographs.
- Route: arrival from the house and continued access through the garden.
For gazebo interior design, attach the furniture product dimensions or a measured outline alongside the reference photograph. Explain what must stay and what may move: the table, the main view, the entry direction or the gazebo position. That distinction makes a useful comparison possible without redrawing the whole garden.
Have the local installer identify site constraints and access needs alongside the design discussion. A supplier can work with your preferred appearance and component arrangement; the local team resolves the supporting site and applicable requirements. An attractive sketch is the starting brief, not the construction drawing.
Questions about organizing a gazebo
Where should I put my gazebo in the backyard?
Compare the activity, trip from the house and view from the seat. Start with a convenient patio position for frequent meals, a side position for a quieter seating area, or the end of a path for a garden destination. Use the same-site comparison to test the trade-offs.
How do I furnish a small gazebo without crowding it?
Choose the main activity and draw the actual furniture in use, including chair movement. Keep one continuous arrival route before adding accessories. The two-plan example shows why the same furniture can leave very different passages.
Does a gazebo look good on a deck?
It can create a distinct sitting area when its scale, openings and relationship to the house are considered together. Compare the whole deck and the occupied furniture; structural suitability is a separate check. Start with both layouts.
What are some good accessories for a gazebo?
Choose items that serve the main use: a reachable side table, suitable cushions or storage for items you actually take outside. Draw their occupied or open positions before buying. Keep lighting, hanging decoration and attachments in a separate design brief rather than assuming every frame accepts them.