Get in touch with Yun-Sculpture company
How to Install a Heavy Stone or Iron Gazebo: Foundations, Anchoring & Safety (Gazebo Foundation Guide)
Installing a 3–20 ton structure is not the same as installing a tent.
It’s not patio furniture.
It’s a building.
If you respect the physics, the process is simple.
If you ignore the gazebo foundation, it will fail.
Don’t panic.
Follow the steps.


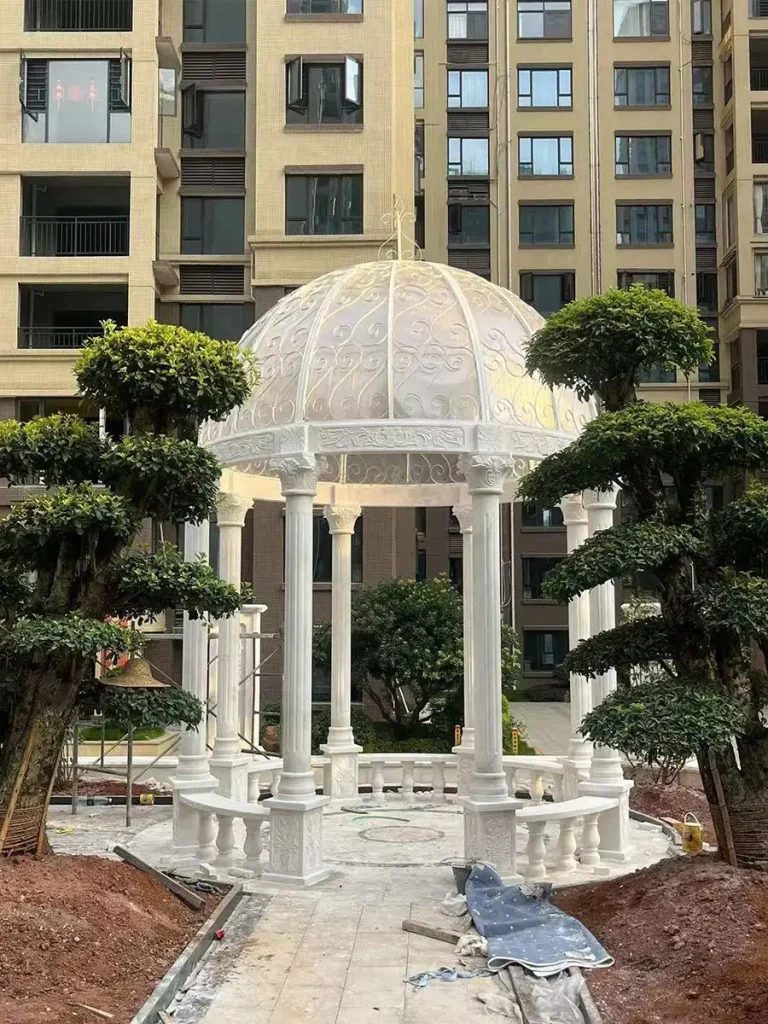

Table of Contents
Table of Contents
Why the Gazebo Foundation Is Everything
A heavy permanent garden gazebo concentrates enormous weight into small points.
Each column can carry 500kg–3000kg.
Place that on dirt or thin pavers?
It sinks.
It tilts.
It cracks.
The “Gazebo Weights” Myth (Let’s Be Honest)
Search “gazebo weights” and you’ll see sandbags and plastic barrels.
That works for a 40kg canopy.
It is a joke for a 3+ ton structure.
Forget cast iron gazebo weights.
You need a Reinforced Concrete Pad.
Typically:
- 20–30 cm thick
- Reinforced with rebar grid
- Compacted sub-base
- Fully cured before installation
Anything less is gambling with gravity.
Phase 1: The Gazebo Foundation (The Most Important Step)
This is 70% of the job.
If the foundation is perfect, installing a gazebo becomes straightforward.
Step 1: Soil Inspection
Before pouring concrete:
- Check soil type
- Ensure proper drainage
- Remove organic material
- Compact subgrade
Soft soil = future sinking.
Safety Rule: Never install directly on dirt.
Step 2: Excavation
Excavate beyond the gazebo footprint.
Typical depth:
- 20–30 cm concrete
- 10–15 cm compacted gravel base
Level everything.
Check twice.
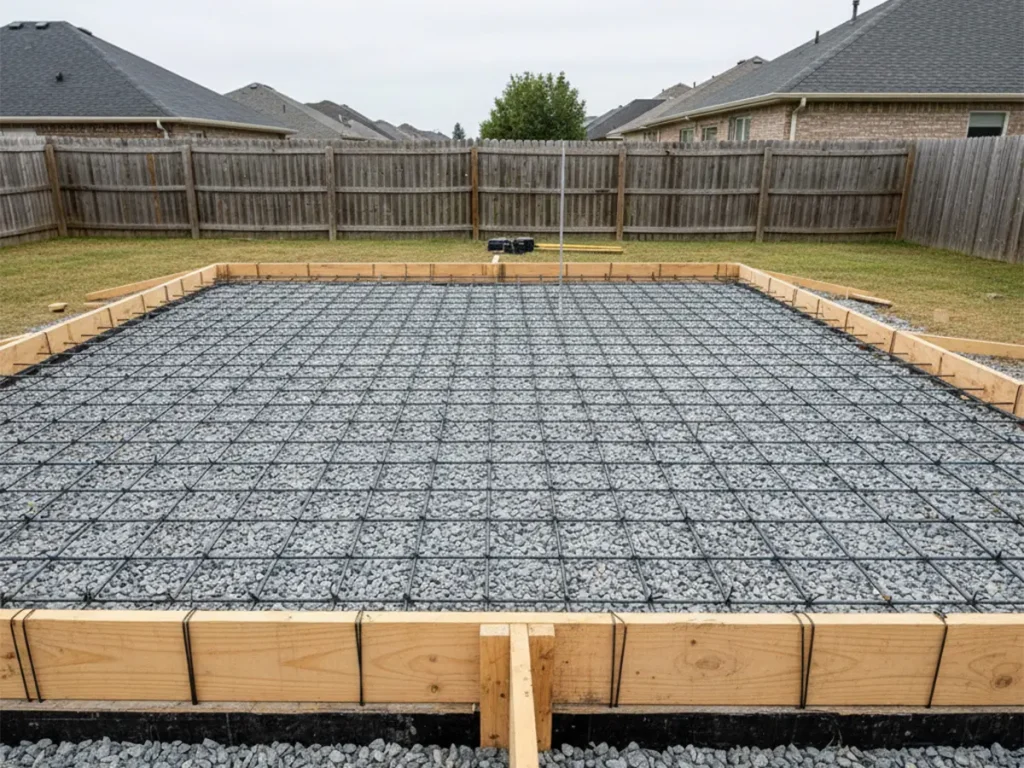
Step 3: Rebar Reinforcement
Use a rebar grid:
- 10–12mm rebar
- 15–20cm spacing
- Tied intersections
This prevents cracking under point loads.
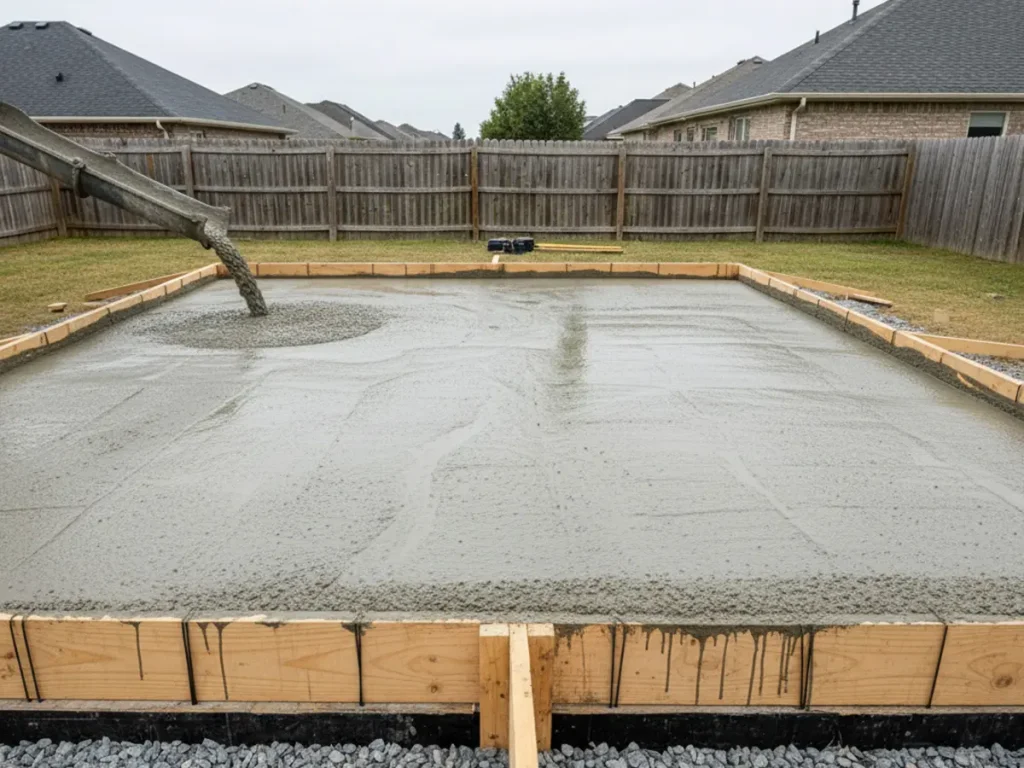
Step 4: Pouring the Concrete Pad
Use structural-grade concrete.
Vibrate to remove air pockets.
Screed and level precisely.
The #1 Mistake: Pouring concrete after the gazebo arrives.
Too late.
Concrete needs:
- Minimum 7 days before light loading
- 28 days for full cure
Plan ahead.
Step 5: Level Verification
Before installation:
- Laser level check
- Confirm pad is perfectly flat
- Confirm anchor positions
A crooked pad = permanent tilt.
Phase 2: Unloading the Gazebo Safely
These components are heavy.
You cannot lift them by hand.
Ever.
Tools Checklist (Pre-Installation)
- Crane (preferred for large units)
- Forklift
- Nylon lifting straps
- Heavy-duty gloves
- Safety helmets
- Laser level
- Stainless Steel Expansion Bolts
- High-strength Epoxy
- Torque wrench
If you don’t have lifting equipment, stop.
Unloading Logic
- Inspect crates.
- Confirm component list.
- Identify numbered parts.
- Lift vertically.
- Never drag stone across ground.
For a full breakdown of the total project cost (including shipping), see our [2026 Price Guide].
Phase 3: Installation Logic – Iron vs Stone
Different materials.
Different physics.
Installing a Cast Iron Gazebo
Assembling a Cast Iron Gazebo requires a crane.
Iron structures bolt together.
They are mechanical systems.
Step-by-Step: Iron Installation
- Position base plates over anchor locations.
- Drill into cured concrete pad.
- Insert Stainless Steel Expansion Bolts.
- Tighten to specified torque.
- Lift and attach beams.
- Secure roof frame.

Why Expansion Bolts Matter
They resist:
- Wind uplift
- Lateral forces
- Seismic movement
Iron must be anchored.
Gravity alone is not enough.
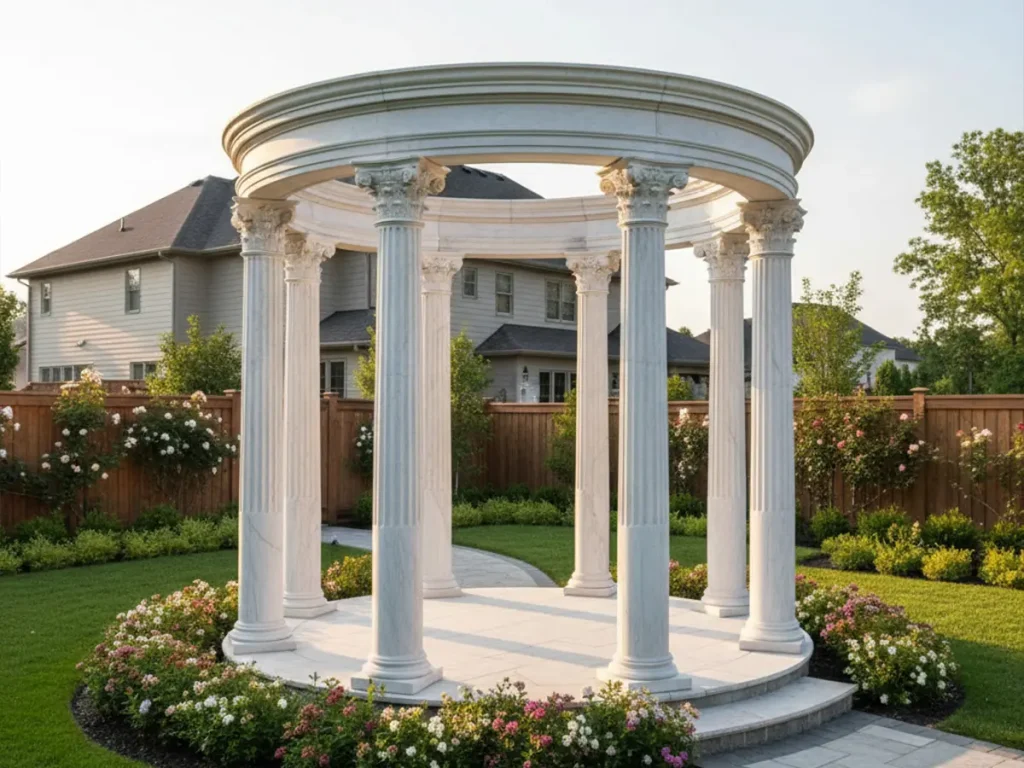
Installing a Marble Gazebo
Installing a [Marble Gazebo] requires epoxy.
Stone structures stack.
But they are not just stacked.
They are bonded and pinned.
Step-by-Step: Stone Installation
- Dry position columns.
- Check alignment.
- Apply high-strength construction Epoxy.
- Insert stainless dowel pins.
- Lower next component carefully.
- Clean excess adhesive immediately.

Why Epoxy Is Critical
Without epoxy:
- Micro-movement occurs.
- Water penetrates joints.
- Freeze-thaw causes cracking.
With epoxy:
- Load transfers evenly.
- Structure behaves monolithically.
- Longevity increases dramatically.
This epoxy method is essential for our [Hand-Carved Marble Gazebos].
Anti-Sinking Engineering
Each column creates a point load.
Point load + soft base = settlement.
Settlement = tilt.
Tilt = stress cracks.
This is why:
- No thin pavers.
- No floating deck.
- No uncompacted soil.
Only a properly engineered concrete pad for gazebo.
Phase 4: The Yun Advantage – Installation Without Guesswork
At Yun Sculpture, we eliminate confusion before shipment.
The Trial Assembly (LEGO for Giants)
Every gazebo is pre-assembled in our factory.
Completely.
Then we:
- Mark each part (A1, A2, B1…)
- Create an installation map
- Photograph every connection
When it arrives onsite?
It’s like LEGO for giants.
Your contractor follows the numbering system.
No guesswork.
No improvisation.
Why This Matters
Without trial assembly:
- Holes may misalign.
- Tolerances compound.
- Installation delays happen.
With our system:
Any local general contractor can do it.
Our installation guide is so detailed that complexity disappears.
Common Installation Mistakes (Avoid These)
1. Installing Before Concrete Cures
Result: Hairline cracks and long-term settlement.
2. Skipping Epoxy on Stone
Result: Joint separation over time.
3. Underestimating Equipment Needs
Result: Unsafe lifting attempts.
Never lift marble columns manually.
4. Installing on Pavers
Pavers are decorative.
They are not structural.
Wind & Safety Considerations
A gazebo acts like a sail.
Wind uplift can exceed 500kg per column.
Iron units must be bolted.
Stone units must be bonded and pinned.
Safety Warning: Never leave roof components unsecured overnight.
Installing a Gazebo: The Calm Engineer’s Mindset
It’s heavy.
But it’s just physics.
Load transfers from:
Roof → Beams → Columns → Foundation → Soil.
If each layer is correct, the structure stands 100+ years.
If one layer fails, everything fails.
Respect the chain.
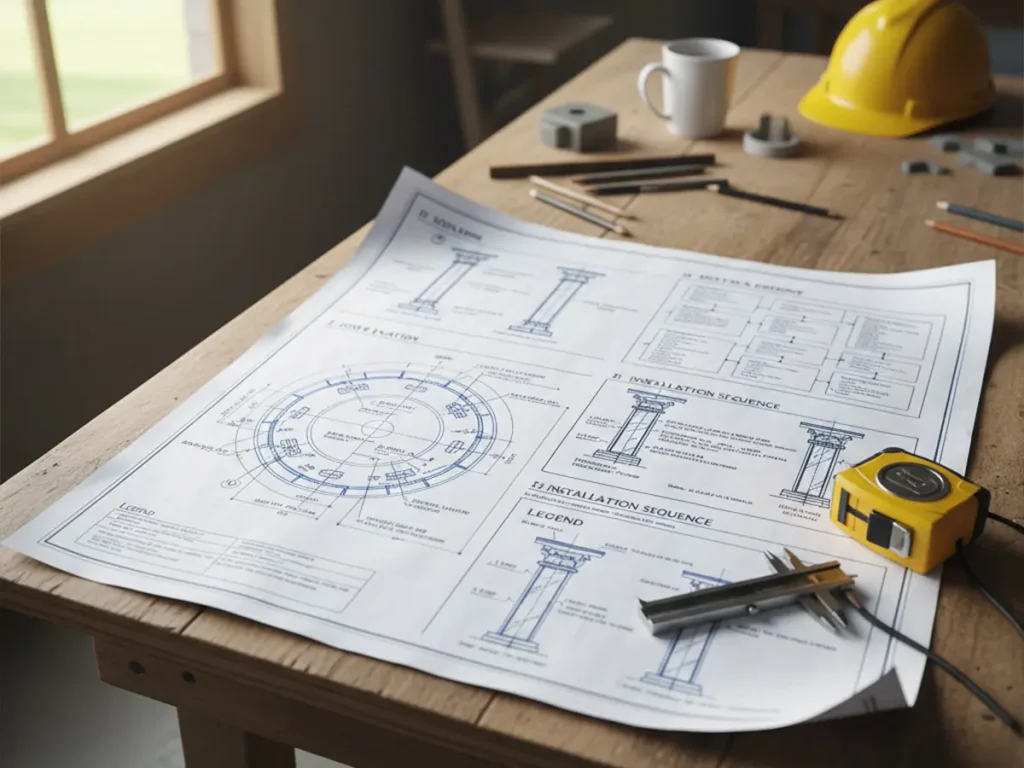
Permit & Drawings Support
Need foundation drawings for approval?
We provide:
- Anchor bolt layout
- Pad thickness specs
- Structural loading data
- Installation sequence diagrams
Quick Reference Summary
For Iron Gazebos
- Reinforced pad (20–30cm)
- Stainless Steel Expansion Bolts
- Crane-assisted lifting
- Torque verification
For Marble Gazebos
- Reinforced pad
- Dowels + structural Epoxy
- Precise leveling
- Clean bonding joints
Ready to Build?
Installing a heavy gazebo is not difficult.
It just requires discipline.
At Yun Sculpture, we prepare everything in advance:
- Trial assembly
- Numbered system
- Installation drawings
- Engineering support
Ready to build?
We offer a Free Installation Blueprint (PDF) and foundation specifications tailored to your model.